How to connect MongoDB to Node.js using mongoose

blog moved to--> https://kmj-007.github.io/
mongoose is a js library that lets you connect node.js with your mongodb cluster in mongodb atlas, it gives you a lot of services like creating schema doing CRUD operation,
In this blog, we will learn how to connect Node.js with MongoDB, so let's get into it
Prerequisites
- Node.js installed on your machine
- some basic knowledge of Node.js & Express
step-1 installing mongoose and Express on your Node.js environment
first, we will create dir then cd over to that directory
$ mkdir mongoose_test_connection
$ cd mongoose_test_connection
Now we install Express and mongoose using npm
$ npm install express mongoose
if you are using yarn then
$ yarn add express mongoose
step-2 making a connection
We have to first require our packages to use, so first create server.js, load mongoose and express to your server by adding the following code to your server.js
server.js
const express = require("express");
const mongoose = require("mongoose");

const app = express();

app.use(express.json());
To create a connection to Mongodb atlas, follow the next steps:
- Open your Cluster tab in Mongodb Atlas and click CONNECT.
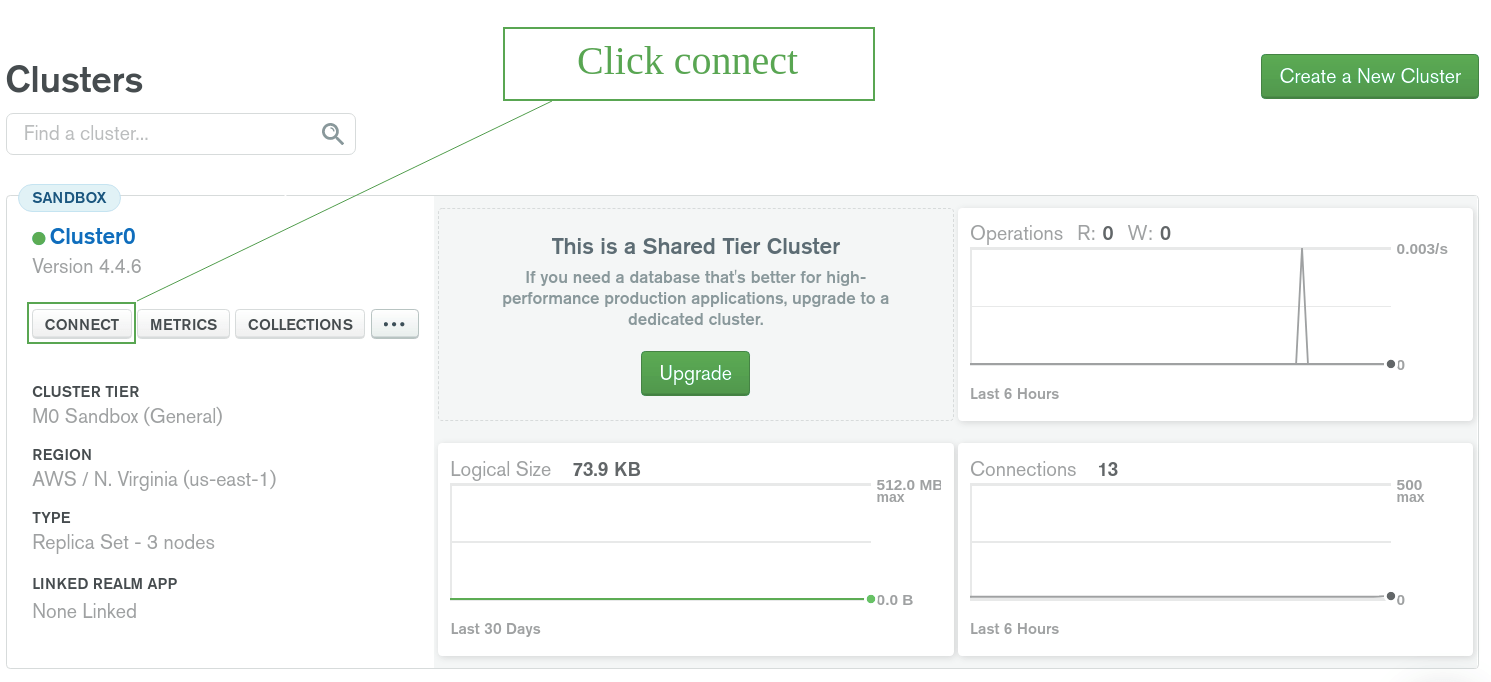
Select Connect your application and choose Node.js for the driver.
Copy the connection string.
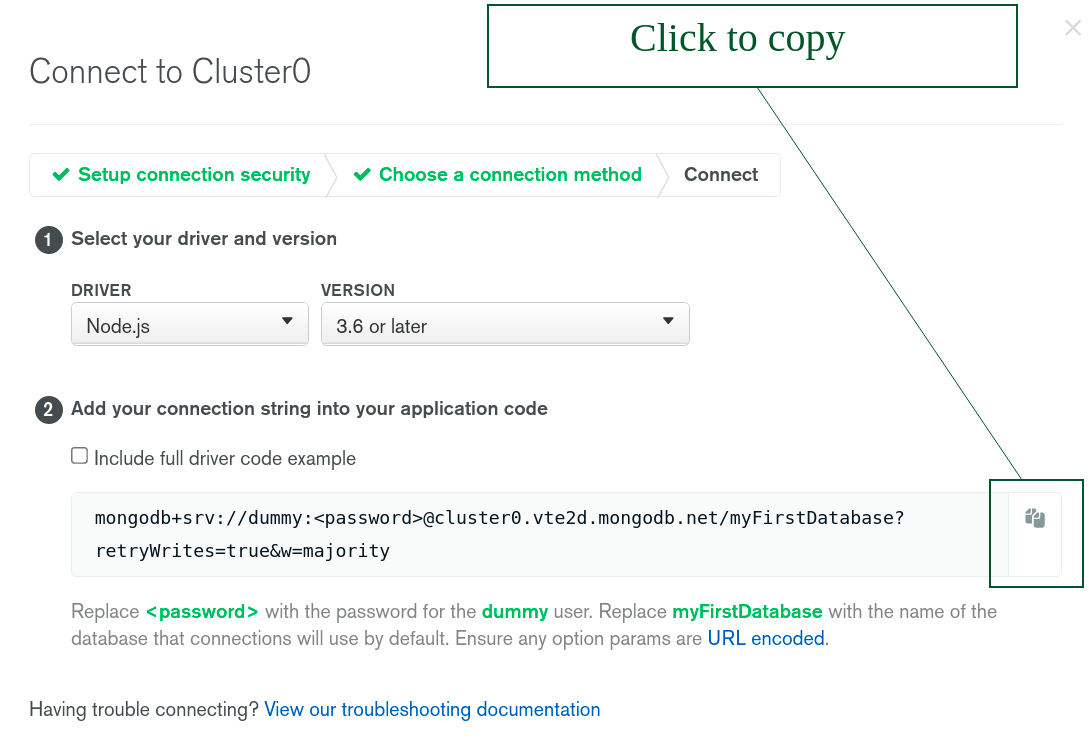
You should see the URI you'll use to connect to your database similar to this: mongodb+srv://<username>:<password>@<cluster-name>.mongodb.net/<db-name>?retryWrites=true&w=majority
if you don't know how to create a cluster or user, you can learn from here
because we can't share sensitive information with others like the username and password of our database, we will use .env file which will store our all variables, and it is good practice to use .env for not to sharing sensitive data
we will install dotenv package for this
# install locally (recommended)
npm install dotenv --save
if you are using yarn, then
yarn add dotenv
After installing the package we will create .env file
we also have to require and configure our .env file in our server, you can also give a path to your env file as a parameter in the config
in server.js add this code
//....

require('dotenv').config();
In .env file, we will create variable name MONGO_URI in which we will store the connection url
replace all with it's value
.env
MONGO_URI:'mongodb+srv://<username>:<password>@<cluster-name>.mongodb.net/<db-name>?retryWrites=true&w=majority'
you have to add .env file to gitignore for not uploading this file
now for accessing this variable we can use it by process.env.MONGO_URI
we declare const URI in server.js and assign it to MONGO_URI
//.....

const URI = process.env.MONGO_URI
now all set up we are ready to make the connection
//.....

mongoose.connect(URI,
  {
    useNewUrlParser: true,
    useFindAndModify: false,
    useUnifiedTopology: true
  }
);
we have to add useNewUrlParser, useFindAndModify, useUnifiedTopology to avoid Deprecation Warnings
To make sure our connection was successful, we will have to add the following code right below your mongoose.connect()
// ...
const db = mongoose.connection;
db.on("error", ()=>{ console.log("connection error: " error)};
db.once("open", ()=> {
  console.log("Connected successfully");
});
Then, we will set our app to listen to port 3000.
//.....
app.listen(3000, () => {
  console.log("Server is running at port 3000");
});
At this point, your application is ready. Serve the app on http://localhost:3000/ by running the command below.
$ node server.js
you can go to http://localhost:3000/ for viewing your app
your terminal will look like this
Server is running at port 3000
Connected successfully
if you see this output in the terminal,
congratulation 🥳 you have successfully connected mongodb atlas with your Node.js
Conclusion
In this tutorial, we have looked at how to set up Mongoose. We have also looked at how to establish a database connection, Mongoose can be used to connect to both MongoDB and MongoDB Atlas to your Node.js app.
I hope you found this blog helpful.
Keep going!
written by: Karan Janthe